Link fails
England United Kingdom - My HO scale Agawa Yard layout is set in a fictional suburb of Vancouver, British Columbia, in the spring of 1969.
It's part of a single-track main line that zig-zags through the suburbs and provides rail access to the area's dwindling towns and industries.
My layout is based on 1960s photos of the Canadian Pacific, and it's fair to say that the railroad was in pretty rough shape at the time.
I've tried to convey this in the rolling stock, locomotives, and buildings by weathering them heavily.
Adjusting to HO Scale
I have built nearly a dozen layouts, but the Agawa Yard was the first in HO.
All of the previous had been in N scale.
I live in England, and I started out modeling British prototypes, but was disappointed with the poor performance of the models I was using.
I switched to American prototypes (Union Pacific), and then to Canadian ones after a trip to Canada in my teens.
My other layouts were full loops, but I didn't have room for that in HO.
Instead, I decided to make a continuous-run switching layout.
I built the sectional benchwork for my 4 x 12-foot layout in 2001, then put the project on hold for nearly two years while I moved into a new house.
I finally laid track and got the railroad running in 2003.
I added all the scenery in about six months, and I took the Agawa Yard to its first train show in 2005.
The benchwork is all L-girder and the legs fold up, so it's easy to transport.
Making a Run-Down Railroad
While I enjoy all aspects of model railroading, my strengths are scenery and weathering.
Effective scenicking requires knowing what you want the scene to convey.
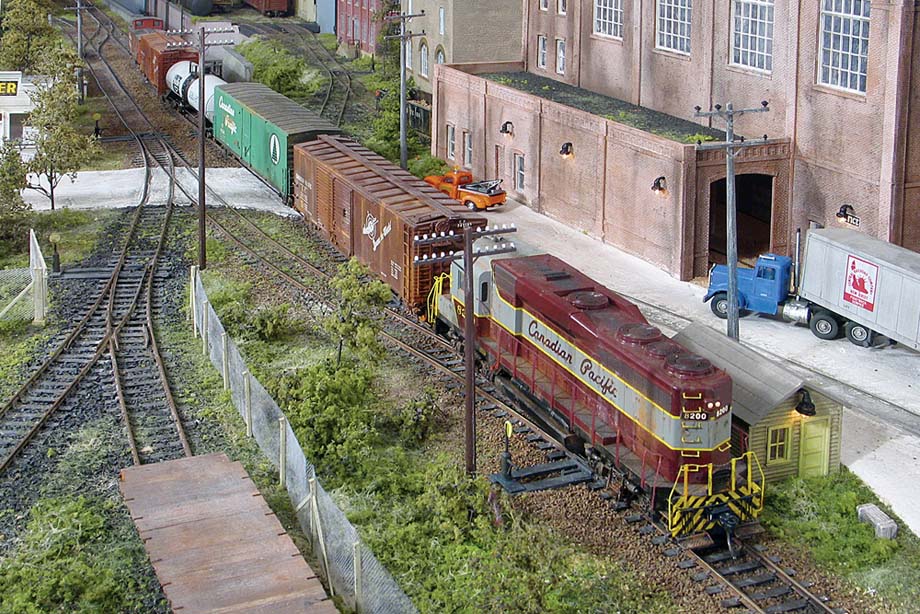
For Agawa Yard, I wanted the layout to reflect the tough times that Canadian Pacific was going through in the late 1960s, namely the bad shape of much of the equipment, both on and off the track.
One of my biggest pet peeves is rolling stock that isn't weathered.
Every piece of rolling stock on my layout looks like it's been through several years of hard service.
All of the wheelsets are painted various shades of rust, and the trucks are drybrushed to look dirty.
I often drybrush washes of color on car sides to add shadows and depth.
Whenever possible, I work from photos of old freight cars so I can weather them prototypically.
The same goes for locomotives.
I also wanted the track to look rundown.
So, before laying the flextrack, I bent it and notched it at 39-scale-foot intervals, the length of prototype track rails.
After the track was laid, it dipped very slightly, but noticeably.
This dipping causes freight cars to rock back and forth realistically while running.
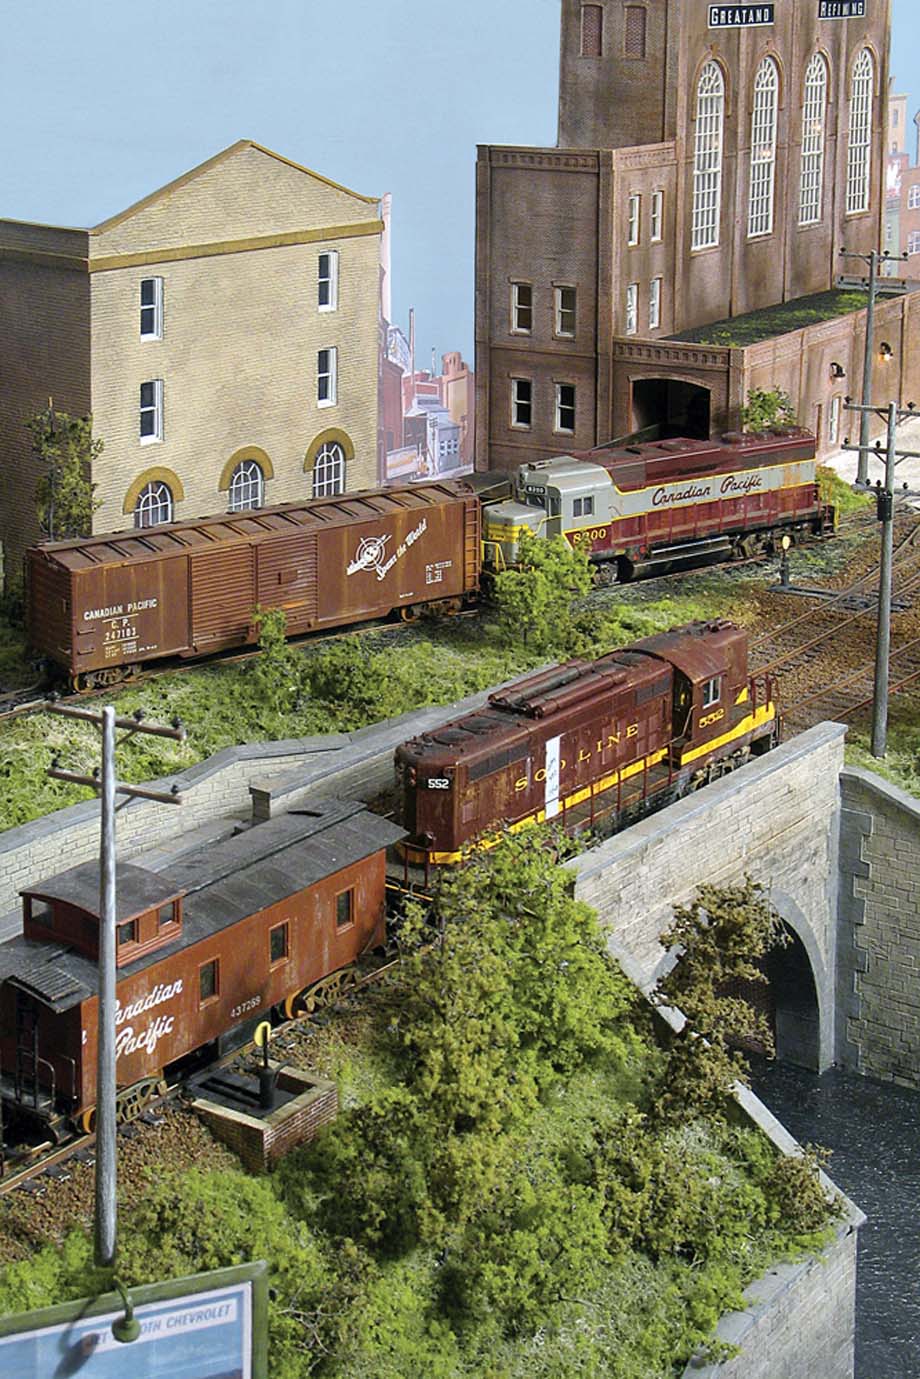
Scenicking a Small Layout
Because the Agawa Yard is so small, it's a scene in itself.
Visitors can see most of the layout from any vantage point.
Overall, I'm most pleased with the bridge over the river, shown in the photo below.
It really adds interest and helps break up the front of the scene.
To make the water, I applied black paint to PVC foam sheets from the European manufacturer Foamex.
(In North America, you can find PVC foam sheets at art supply stores and plastics suppliers.)
I then poured a layer of Woodland Scenics Realistic Water on top.
I completed the river scene by adding a layer of Woodland Scenics Water Effects, stippling the surface to make it look like wind is blowing over the water.
To make foliage, I also used Woodland Scenics products, including a lot of fine-leaf foliage for trees and large shrubs.
I started by applying latex house paint to the scenery.
I then added real dirt from a road near my house for texture.
I find that if I spend too much time scenicking a particular area, it can start to look too perfect.
Nature isn't like that.
To avoid a manicured look, my technique is to simply throw down a bunch of different types of ground foam and foliage, soak them in diluted adhesive, then let the whole thing dry.
Later, I go back and add trees, shrubs, and bushes.
I also sprinkle static grass on certain areas to give them a little lift.
I've learned a lot about weathering and making realistic scenery on this layout. I'd love to have the space to expand the railroad or start a new one, but instead, I plan to slowly add more detail to the scene so there's something new for people to see at shows.
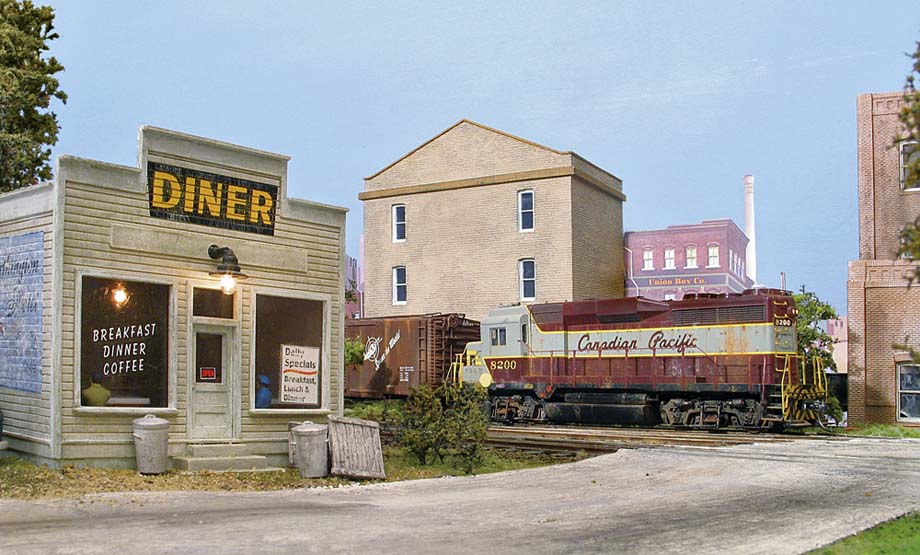
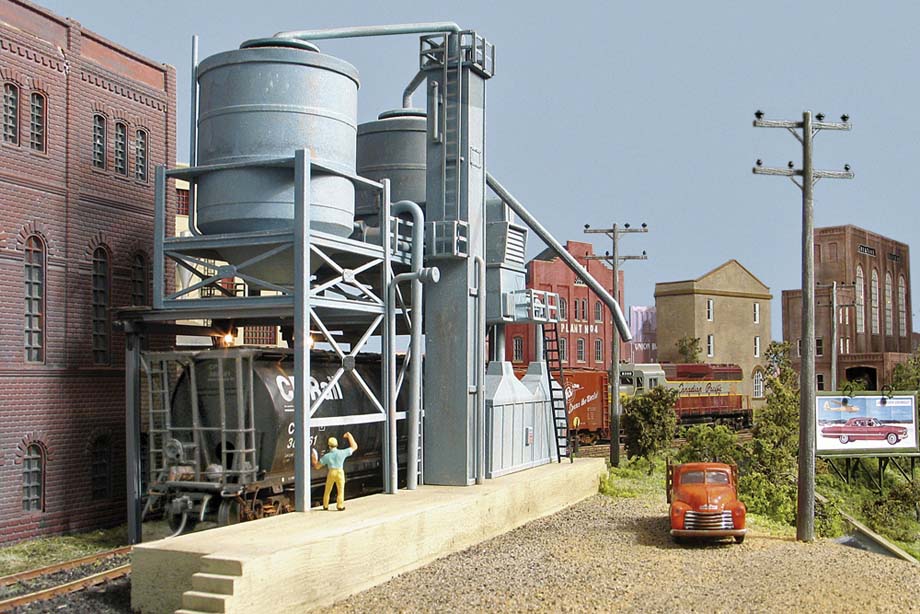
Structures and Industry
About half of the structures on the layout are scratchbuilt, and the other half are kitbashed.
I used Foamex to scratchbuild buildings and bridges.
Available in several thicknesses (up to 4mm or about 3/16 inch), Foamex is strong and easy to cut and glue.
I also use balsawood stained to the appropriate color if I need to make a loading dock or wood facade on a building.
The backdrop is integral to the benchwork and supports part of the layout.
It's made from 1/4 inch plywood painted black on one side and sky blue on the other.
I covered the backdrop with printouts of buildings.
Adding Necessary Details
In some areas on a layout, such as the sides of buildings, and the backs of walls, I can get away with not showing much detail because they are rarely seen by visitors.
Because I operate the layout from the front, I never see these areas either.
I try to light the layout to look like either dawn or dusk.
Lights positioned in and around the structures add to the atmosphere, highlight the buildings' detailed interiors, and produce dramatic shadows across the tracks.
The lights are powered from the main track bus.
They're all grain-of-wheat bulbs except for the truck and car headlights, which are grain-of-rice bulbs wired in series with a resistor from the main power bus.
Making Chain Link Fencing
Some features on a layout are very noticeable to viewers and need to be well detailed.
One such item on the Agawa Yard is the chain link fence in front of BoxStrong, which I modified from a Ratio kit.
The kit included a large number of concrete fence posts and a roll of mesh material.

It takes a lot of patience to cut the material straight and to the correct width.
I cut off the tops of the posts that held the barbed wire because I decided the industry wouldn't require that level of security.
DCC and Sound
I connect a Lenz LH 100 Digital Command Control (DCC) set to my laptop, which sits above one return loop on the left side of the layout.
During an exhibition, I can operate the layout from the front because I have two webcams that look down the fiddle yard from both ends.
This allows me to see what's going on around the back.
Using a PC also means that I can easily select a route to or from a particular track in the yard by simply pressing a button.
All of the turnouts are connected to Peco switch motors, and I control them from the laptop.
I used Peco code 75 for the visible track and code 100 for the hidden staging yard.
My sound-equipped locomotives add another dimension of realism to the layout.
The locomotive roster includes two Life-Like GP9s (one with factory-equipped sound and one equipped with a Loksound decoder), a GP30 equipped with a Soundtraxx decoder, and an SW1200 equipped with a Loksound decoder.
I modified one GP9 to look like a locomotive in a photo I'd found.
It had old barrel headlights and a high nose-mounted bell.
I made the lights with brass tubing and Perspex lenses.
For the bell, I used a Detail Associates casting that I found at Caboose Hobbies during one of my trips to the United States.
I usually have only four locomotives running at a time.
Two operators can work on the layout, but it's a tight fit.
Beyond Agawa Yard
The Agawa Yard has done just what I wanted it to do.
The railroad helped me transition from N to HO, and it taught me a lot about detailing freight cars, scenery, and buildings.
The layout has gotten me into DCC to such an extent that I can now teach and explain it to others who don't yet have a grasp on the technology.
Finally, it's gotten me out to see a little bit more of England when I attend shows.
I've decided that my next effort will be an N scale around-the-walls layout set in the Canadian Rockies.
I'm looking forward to modeling mountains, curves, and more rivers.
Chris Dening's story and Steve Flint's photos are used with the permission of Peco Publications.
This story originally appeared in the March 2019 issue of Model Railroader – Ed.
Chris Dening.
(likely no image with original article)
(usually because it's been seen before)
provisions in Section 29 of the Canadian
Copyright Modernization Act.
